Robot Vacuum Not Working? Fix Common Issues Now
Editorial note: Rare One is reader-supported. We may earn a commission if you buy through links on our site, at no extra cost to you. Our recommendations focus on practical fit, features, value, and common buyer concerns.
📑 In This Article
- Why Is My Robot Vacuum Not Working - Quick Answer
- Most Common Causes
- Step-by-Step Checks You Can Do Safely
- What Not to Do
- Safety and Editorial Note
- Should You Repair, Replace, or Upgrade?
- How to Prevent This Problem Next Time
- Related Buying Advice
Why Is My Robot Vacuum Not Working - Quick Answer
If your robot vacuum isn't working, the most common culprits are usually simple to fix: a full dustbin, tangled brushes, a blocked sensor, or a low battery not charging correctly. Often, a quick clean or a system reset can get your device back on track.
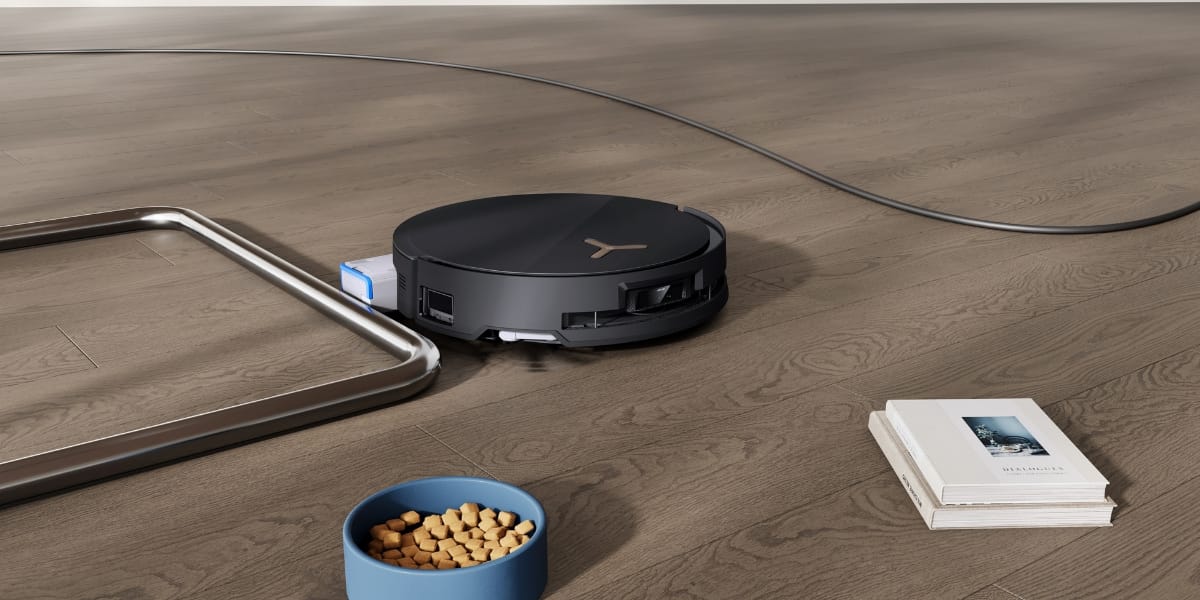
Quick Action Summary: Start by checking the dustbin, brushes, and charging contacts. Ensure your robot vacuum is fully charged and free of visible obstructions. A soft reset (powering off and on) can often resolve minor software glitches. Always unplug the charging base before performing any cleaning or maintenance to ensure safety. If you encounter electrical issues, strange noises, or persistent error lights after basic checks, stop and consider professional help or replacement options.
Most Common Causes
Robot vacuums are complex devices, but many issues stem from common maintenance neglects or minor operational hiccups. Here's a look at the most frequent reasons your robot vacuum might not be working as expected:
| Possible Cause | What It Looks Like | What to Check First |
|---|---|---|
| Full Dustbin or Clogged Filter | Vacuum stops mid-cycle, leaves debris behind, or has reduced suction power. | Empty the dustbin completely and clean or replace the filter according to your model's instructions. |
| Tangled Brushes or Wheels | Robot moves erratically, makes grinding noises, spins in circles, or gets stuck frequently. | Carefully remove the main brush roll and side brushes, clearing any hair, string, or debris. Check wheels for obstructions. |
| Dirty or Blocked Sensors | Robot bumps into objects, falls down stairs, or fails to navigate its cleaning area efficiently. | Wipe down all sensors (cliff sensors, bumper sensors, wall sensors) with a dry, soft cloth. |
| Battery or Charging Issues | Robot won't turn on, won't charge, or has very short run times. (e.g., similar to refrigerator power issues) | Ensure the charging base is plugged in, the robot is properly docked, and the charging contacts on both the robot and base are clean. |
| Software Glitch or Firmware Error | Robot behaves unpredictably, displays a generic error, or is unresponsive. | Perform a soft reset (power off/on) or a hard reset if recommended by the manufacturer. |
| Obstructions in Airflow/Pathways | Vacuum doesn't pick up dirt, leaves trails, or makes unusual sucking noises. | Inspect the suction path, nozzle, and any internal channels for blockages. |
Step-by-Step Checks You Can Do Safely
Before you consider calling for service or replacing your device, there are several safe, simple checks you can perform at home. These steps cover the most common reasons why your robot vacuum might not be working.
1. Start With the Simple Checks
Many issues can be resolved by addressing basic power, placement, and capacity concerns. These are quick checks that don't require any tools.
- Verify Power and Charging: Is the charging base plugged into a working outlet? Is the robot correctly docked, with its charging contacts aligned? Sometimes, a loose plug or a tripped circuit breaker can be the culprit. If your robot vacuum is not charging, ensure the contacts on both the robot and the base are clean and free of debris.
- Check the Dustbin and Filter: A full dustbin is a common reason for a robot vacuum to stop working or have reduced performance. Empty it completely. Then, check the air filter. A clogged filter restricts airflow, reducing suction and potentially causing the motor to overheat or shut down. Clean or replace it as recommended by the manufacturer – typically every 1-3 months.
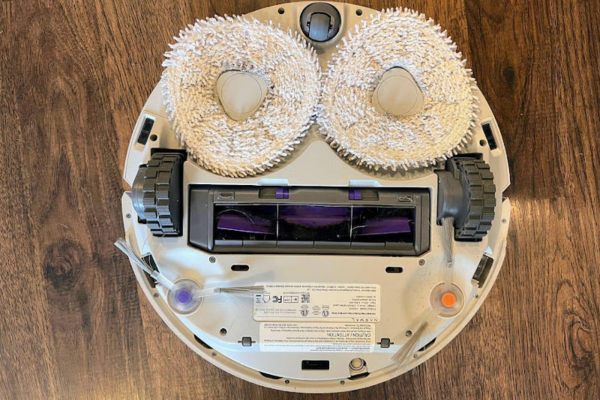
- Inspect Brushes and Wheels: Turn the robot over and examine the main brush roll and side brushes. Hair, string, pet fur, or even small toys can get tangled, preventing them from spinning. Similarly, check the wheels for any obstructions that might prevent free movement. This is a frequent cause for a robot vacuum to spin in circles or get stuck.
- Clean All Sensors: Robot vacuums rely heavily on their sensors to navigate. Dust, dirt, or debris on cliff sensors (to prevent falls), bumper sensors (for detecting obstacles), and wall sensors can cause erratic behavior. Use a dry, soft cloth or a cotton swab to gently wipe all visible sensors.
- Ensure Proper Placement: Make sure the robot isn't trapped in a tight space or on a surface it can't navigate (e.g., very thick shag carpet it's not designed for). Sometimes, simply moving it to an open area and restarting can resolve temporary navigation issues.
2. Clean or Reset the Parts That Commonly Cause Trouble
If the initial checks don't solve the problem, a more thorough cleaning or a system reset often does the trick. Remember to always power off and unplug your robot vacuum from its charging base before performing any cleaning.
- Thorough Brush Cleaning: Remove the main brush roll and use the included cleaning tool (or a small pair of scissors) to cut away any tightly wound hair or fibers. Pay attention to the brush bearings or end caps, as hair can accumulate there and prevent rotation. Do the same for the side brushes.
- Wheel and Axle Cleaning: Gently pull the wheels outwards (if your model allows) or use tweezers to remove debris from around the wheel axles. Ensure the wheels can spin freely and are not jammed.
- Suction Port and Airflow Path: Inspect the area where dirt is sucked into the dustbin. Sometimes, larger debris can get lodged here. Use a small brush or compressed air to clear any blockages. This is vital if your robot vacuum stopped working efficiently or is leaving dirt behind.
- Reset Your Robot Vacuum: Many issues, including why your Shark robot vacuum not working or why your Xiaomi robot vacuum not working, can be software-related. A soft reset usually involves holding down the power button for 10-20 seconds until the lights go out, then turning it back on. Some models have a specific reset button (often a small pinhole) or require removing the battery for a few minutes. Consult your user manual for the exact reset procedure for your specific model. This can resolve glitches that cause the robot to be unresponsive or display persistent errors.
- Clean Charging Contacts: Even if they look clean, a thin film of grime can prevent proper charging. Use a dry cloth or a melamine foam eraser to gently wipe the metal charging contacts on both the robot and its base. This is crucial if your robot vacuum won't charge.
3. Watch for Signs the Problem Is More Serious
While many robot vacuum problems are fixable at home, some signs indicate a deeper issue that requires professional attention or might mean it's time for a replacement. Do not attempt to open the robot's sealed casing or tamper with internal wiring.
- Persistent Error Codes: If your robot consistently displays the same error code even after cleaning and resetting, it might indicate a failing component like a motor, battery, or circuit board.
- Unusual Noises or Smells: Grinding sounds, screeching, or a burning smell are clear indicators of mechanical or electrical failure. Stop using the device immediately.
- Battery Degradation: If your robot vacuum not charging is a recurring issue, or if the battery life has drastically reduced over time (e.g., from 90 minutes to 15 minutes), the battery may need replacement. While some batteries are user-replaceable, others are not.
- No Power After All Checks: If the robot won't turn on at all, even after confirming the charging base works and contacts are clean, there might be a deeper electrical problem or a completely dead battery.
Safety First: If any troubleshooting step involves opening the robot's sealed components, dealing with exposed wiring, or if you suspect an electrical fault, stop immediately. These repairs can be dangerous and should only be handled by qualified service technicians.
What Not to Do
When your robot vacuum isn't working, it's tempting to try quick fixes, but some actions can cause more harm than good or even be unsafe:
- Don't Force Components: If a brush or wheel is stuck, don't try to force it to move. You could break plastic parts or damage internal motors. Instead, carefully remove obstructions.
- Avoid Using Water or Harsh Chemicals: Never use water or cleaning sprays directly on the robot vacuum's body or sensors. Electronic components can be damaged, and sensors can be permanently blurred. Stick to dry cloths or compressed air for cleaning.
- Don't Open the Main Casing: Unless specifically instructed by the manufacturer for a user-replaceable part (like a battery), do not attempt to open the main body of the robot vacuum. This can void warranties, expose you to electrical hazards, and often leads to irreparable damage to delicate internal components.
- Don't Ignore Warning Lights/Sounds: If your robot vacuum is displaying an error light or making an unusual noise, don't just keep running it. This can exacerbate the problem, leading to more costly repairs or total failure.
- Don't Use Non-OEM Parts (Unless Specified): While some third-party filters and brushes are fine, be cautious with critical components like batteries or charging bases. Using unapproved parts can lead to compatibility issues, reduced performance, or even safety risks.
Safety and Editorial Note
This guide focuses on safe homeowner checks, common maintenance causes, and clear decision points for when to seek professional help. We prioritize practical symptoms, manufacturer-style safety limits, and clear escalation signs over risky DIY repairs. Our advice is designed to help you diagnose and safely resolve common issues without specialized tools or technical expertise. When in doubt about electrical components or internal mechanics, it's always best to consult a qualified professional.
Should You Repair, Replace, or Upgrade?
Deciding whether to repair your existing robot vacuum or invest in a new one depends on several factors. Consider these points when your robot vacuum is not working and you're weighing your options:
- Age of the Device: If your robot vacuum is several years old (typically 3-5+ years), newer models often offer significant improvements in navigation, suction power, battery life, and smart features. The cost of a major repair might be better put towards an upgrade.
- Cost of Repair vs. Replacement: Get an estimate for the repair. If the repair cost approaches or exceeds 50% of the price of a new, comparable model, replacing it often makes more financial sense, especially if it's an older unit.
- Frequency of Issues: Is this a one-off problem, or are you constantly troubleshooting your robot vacuum? Recurring issues, even minor ones, can be a sign of overall wear and tear, suggesting it might be time for a more reliable unit.
- Availability of Parts: For older or less popular models, finding replacement parts (especially batteries or main circuit boards) can be difficult or expensive.
- Safety Concerns: If the problem involves electrical issues, strange smells, or overheating, it's a significant safety concern. Repairing these might be complex and costly, making replacement a safer bet. For other appliance issues, like dryer problems or air fryer malfunctions, similar safety considerations apply.
- Desire for New Features: Modern robot vacuums offer advanced mapping, multi-floor support, self-emptying bins, and integration with smart home systems. If your current model lacks these and you're frustrated by its limitations, an upgrade might enhance your cleaning experience significantly. When considering an upgrade, look for models with robust navigation and easy maintenance.
How to Prevent This Problem Next Time
Proactive maintenance is key to extending the life of your robot vacuum and avoiding frustrating breakdowns. A few simple habits can keep your device running smoothly:
- Regular Dustbin Emptying: Make it a habit to empty the dustbin after every few cleaning cycles, or even after every cycle if you have pets or a large home. This prevents clogs and maintains suction.
- Brush Roll and Side Brush Cleaning: Inspect and clean the main brush roll and side brushes weekly. Remove tangled hair, threads, and debris to prevent them from seizing up or damaging the motor.
- Sensor Wiping: Use a dry, soft cloth to wipe down all sensors (cliff, bumper, wall) every week or two. Clean sensors ensure accurate navigation and prevent the robot from getting stuck or falling.
- Filter Maintenance: Clean or replace your robot vacuum's filter regularly as recommended by the manufacturer, typically every 1-3 months. A clean filter is crucial for optimal suction and air quality.
- Charging Contact Cleaning: Periodically wipe the charging contacts on both the robot and its base with a dry cloth to ensure a consistent connection and prevent charging failures. This helps ensure your robot vacuum is not charging issues don't become a bigger problem.
- Clear the Cleaning Area: Before running your robot vacuum, do a quick sweep of the floor to remove small objects, cables, or loose debris that could tangle in the brushes or get jammed in the suction path.
- Firmware Updates: Keep your robot vacuum's firmware updated through its companion app. Manufacturers often release updates that improve navigation, battery management, and overall performance.
Related Buying Advice
If you find yourself needing to replace your robot vacuum, consider what features are most important to you based on your previous experience. Look for models with strong suction, reliable navigation (especially if your old one constantly got stuck), and easy-to-clean components. For pet owners, models specifically designed to handle pet hair with tangle-free brushes are a major plus, similar to how you'd look for the best cordless vacuum for pet hair. Consider self-emptying bins for convenience, and check battery life specifications to ensure it can cover your home's size without needing to recharge mid-cycle. Prioritize models known for durability and readily available replacement parts to avoid future troubleshooting headaches.
Frequently Asked Questions
Why is my robot vacuum not working at all?
If your robot vacuum is completely unresponsive, first check its charging status. Ensure the charging base is plugged in and the robot is properly docked with clean contacts. If it still doesn't turn on after charging, try a full system reset (consult your manual) or consider if the battery needs replacement, especially if the unit is several years old.
Why is my Shark robot vacuum not working or my Xiaomi robot vacuum not working?
Brand-specific issues like "why is my Shark robot vacuum not working" or "why is my Xiaomi robot vacuum not working" often boil down to the same common problems seen across all robot vacuums: a full dustbin, tangled brushes, dirty sensors, or a charging issue. Always start with these basic checks, then consult your specific model's manual for unique error codes or reset procedures.
How do I reset my robot vacuum?
Most robot vacuums can be reset by holding down the power button for 10-20 seconds until the lights turn off, then releasing and pressing it again to power on. Some models have a small pinhole reset button you can press with a paperclip, or they may require removing the battery for a few minutes. Always refer to your robot vacuum's user manual for the precise reset instructions for your model.
Why is my robot vacuum not charging or why won't my robot vacuum charge?
If your robot vacuum isn't charging, first confirm the charging base is plugged in and receiving power. Then, thoroughly clean the metal charging contacts on both the robot and the base with a dry cloth or melamine foam eraser, as dirt can prevent a connection. Ensure the robot is correctly aligned and seated on the base. If these steps don't work, the battery may be degraded and require replacement, or there could be an issue with the charging base itself.
Why does my robot vacuum keep stopping or getting stuck?
A robot vacuum that frequently stops or gets stuck usually points to tangled brushes or wheels, dirty navigation sensors, or an overloaded dustbin. Check for obstructions like cables, rugs, or small objects in its path. Cleaning the brushes, wheels, and sensors, along with emptying the dustbin, will often resolve these intermittent stopping issues.