Coffee Maker Not Working? Troubleshooting & Solutions
Editorial note: Rare One is reader-supported. We may earn a commission if you buy through links on our site, at no extra cost to you. Our recommendations focus on practical fit, features, value, and common buyer concerns.
📑 In This Article
- Why Is My Coffee Maker Not Working - Quick Answer
- Most Common Causes When Your Coffee Maker Isn't Working
- Step-by-Step Checks You Can Do Safely
- What Not to Do When Your Coffee Maker Isn't Working
- Safety and Editorial Note
- Should You Repair, Replace, or Upgrade Your Coffee Maker?
- How to Prevent This Problem Next Time
- Related Buying Advice
Why Is My Coffee Maker Not Working - Quick Answer
If your coffee maker isn't working, the most frequent culprits are issues with power, mineral buildup (scale), or a clogged water path. Often, a simple check of the power connection, ensuring all parts are correctly seated, or performing a descaling cycle can resolve the problem and get your coffee brewing again.
Quick Action Summary:
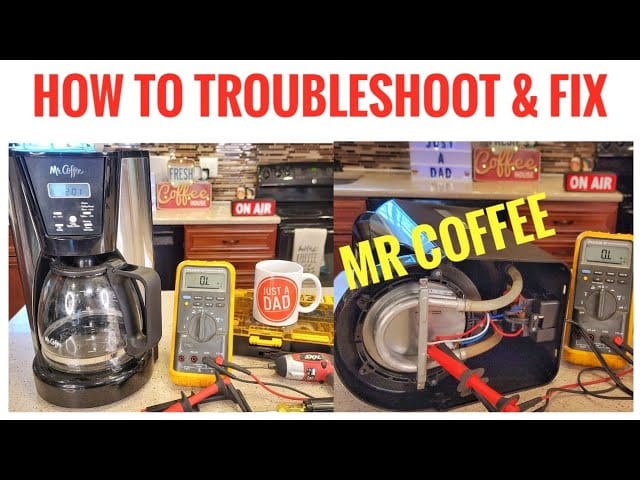
- Check First: Ensure the coffee maker is plugged in, the outlet works, and the water reservoir is full and seated correctly.
- Safe to Try: Unplug the machine for a few minutes to reset it, clean the brew basket and spray head, and perform a descaling cycle using white vinegar or a descaling solution.
- When to Stop: If you see sparks, smell burning, or if the issue seems related to internal electrical components or water leaks beyond basic cleaning, stop troubleshooting and consult a qualified technician. Do not attempt to open the appliance casing.
Most Common Causes When Your Coffee Maker Isn't Working
When your reliable coffee maker suddenly decides to take a break, it can be frustrating. We've identified the most common reasons why your coffee machine might not be working, along with quick initial checks to help you pinpoint the issue.
| Possible Cause | What It Looks Like | What to Check First |
|---|---|---|
| No Power / Not Turning On | The machine shows no lights, no sounds, and doesn't respond to buttons. If your coffee maker is not turning on, this is the first area to investigate. | Is it plugged into a working outlet? Is the power cord damaged? Check the circuit breaker. |
| Mineral Buildup (Scale) | Slow brewing, incomplete brewing, strange noises, or no water dispensing. This is a very common reason why your coffee machine is not working properly. | When was the last time you descaled it? Look for white, chalky deposits around the water reservoir or brew head. |
| Clogged Water Path | Water isn't flowing, or it's dripping slowly. The machine may heat up, but no coffee comes out. | Check the brew head/spray nozzle for visible debris. Ensure the water reservoir filter (if present) isn't blocked. |
| Improper Setup / Alignment | Water leaks from unexpected places, coffee grounds overflow, or the machine simply won't start a brew cycle. | Is the water reservoir fully seated? Is the brew basket correctly inserted? Is the carafe placed properly? |
| Faulty Heating Element | The machine turns on but doesn't heat water, or the coffee is lukewarm. | Does the machine make heating sounds? Feel the hot plate (if applicable) – is it warm? |
| Sensor Malfunction | The machine acts erratically, stops mid-brew, or displays an error code (if equipped) without an obvious cause. | Try a simple power cycle (unplug and replug). Ensure all components are clean and dry, especially around sensors. |
Step-by-Step Checks You Can Do Safely
Before you consider calling for service or replacing your machine, there are several safe and easy troubleshooting steps you can take. These checks address the most frequent issues that cause a coffee maker not to work.
1. Start With the Simple Checks
Many problems with your coffee maker can be solved by verifying basic operational requirements. These initial checks are quick and require no tools.
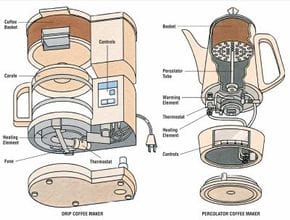
- Check the Power Supply: First, ensure the coffee maker is securely plugged into a functional wall outlet. Try plugging another small appliance into the same outlet to confirm it has power. If not, check your home's circuit breaker box for a tripped breaker. Sometimes, a loose connection is all it takes for your coffee maker not to turn on.
- Verify Water Reservoir and Lid: Most coffee makers, especially models like a Keurig or Ninja, have sensors that prevent brewing if the water reservoir isn't properly filled or seated. Make sure it's pushed all the way in and that the lid is closed correctly.
- Inspect the Brew Basket and Carafe: Ensure the brew basket (where the coffee grounds go) is correctly inserted and that the carafe or mug is properly positioned on the warming plate or under the dispenser. If these aren't aligned, the machine might not start or could overflow.
- Check for Visual Clogs: Look at the spray head or dispenser nozzle where water comes out. Is there any visible coffee ground residue or debris blocking the flow? A simple wipe can sometimes clear a minor blockage.
- Review Settings: If your coffee machine is not working properly, double-check that you haven't accidentally set a timer for a future brew or selected a different mode (e.g., hot water only, strength setting) that prevents a standard coffee cycle.
2. Clean or Reset the Parts That Commonly Cause Trouble
After the initial checks, the next step involves cleaning and resetting, which often resolves issues related to mineral buildup or temporary electronic glitches. This is particularly relevant if your coffee machine is not working as efficiently as it once did.
- Perform a Descaling Cycle: Mineral buildup (limescale) from tap water is a leading cause of coffee maker issues, especially for machines like Cuisinart, DeLonghi, or Bella. Limescale can clog internal tubes and the heating element, causing slow brewing, incomplete brewing, or preventing water from dispensing entirely.
- Fill the water reservoir with a solution of equal parts white vinegar and water, or use a manufacturer-recommended descaling solution.
- Run a brew cycle without coffee grounds.
- Repeat the cycle with plain water 2-3 times to flush out any remaining vinegar taste. We recommend descaling every 1-3 months, depending on your water hardness and usage.
- Clean the Brew Head/Spray Nozzle: For many drip coffee makers, the spray head can get clogged with coffee oils and mineral deposits. Use a small brush or a paperclip to gently clear any blockages in the tiny holes where water is dispensed over the grounds.
- Clean Removable Parts: Thoroughly wash the brew basket, carafe, and water reservoir with warm, soapy water. Ensure they are completely dry before reassembling. Residual coffee oils can sometimes affect sensors or cause minor clogs.
- Reset the Machine: A simple power cycle can often clear minor electronic glitches. Unplug your coffee maker from the wall outlet for at least 5-10 minutes, then plug it back in. This can reset internal electronics and resolve temporary malfunctions that cause your coffee maker not to work.
3. Watch for Signs the Problem Is More Serious
While many issues are fixable at home, some signs indicate a more serious problem that requires professional attention or a replacement. If you observe any of these, stop troubleshooting immediately.
- Burning Smell or Smoke: Any electrical burning smell or visible smoke coming from the appliance is a serious safety hazard. Unplug the machine immediately and do not use it again.
- Electrical Issues: If the coffee maker trips your circuit breaker repeatedly or causes sparks when plugged in, there's an internal electrical fault. This is not a DIY repair.
- Significant Leaks: While a few drips can be normal, if water is actively leaking from the bottom or sides of the machine (beyond simple condensation), it could indicate a cracked housing, a broken internal seal, or a damaged water line.
- Unusual Noises: Loud grinding, banging, or persistent screeching sounds that aren't part of normal operation could point to a failing pump or internal motor.
- Total Failure After Basic Checks: If your coffee maker is not turning on, even after checking the power, outlet, and trying a reset, the internal power supply or control board may have failed.
What Not to Do When Your Coffee Maker Isn't Working
When troubleshooting, it's crucial to prioritize safety and avoid actions that could worsen the problem or create a hazard.
- Do NOT Open the Appliance Casing: Unless you are a qualified technician, never attempt to open the outer casing of your coffee maker. This exposes you to electrical components and can void warranties. Internal repairs involving electrical wiring or sealed components should always be left to professionals.
- Do NOT Force Parts: If a component feels stuck or doesn't fit, don't force it. This can break plastic tabs, crack housing, or damage internal mechanisms, turning a minor issue into a major repair.
- Do NOT Use Abrasive Cleaners or Tools: Avoid using harsh chemical cleaners, scouring pads, or metal tools inside the machine. These can scratch surfaces, leave chemical residues, or damage delicate components. Stick to mild soap, water, vinegar, or manufacturer-approved descaling solutions.
- Do NOT Ignore Safety Warnings: If the machine feels hot to the touch in unusual places, smells like burning plastic, or trips your circuit breaker, unplug it immediately. Continuing to operate a faulty appliance can lead to electrical shock or fire.
- Do NOT Attempt to Bypass Safety Features: Never try to trick sensors (e.g., by taping down a lid switch) to get the machine to work. These features are in place for your safety and to protect the appliance.
Safety and Editorial Note
This guide focuses on safe homeowner checks and common maintenance causes for why your coffee maker might not be working. We prioritize practical symptoms, manufacturer-style safety limits, and clear escalation signs over risky DIY repairs. Our advice is designed to help you diagnose and potentially fix issues that don't involve opening the appliance's sealed components or dealing with internal electrical systems. For any problems involving electricity, water lines that are not easily accessible, or internal parts, we strongly advise consulting a qualified appliance repair professional to ensure safety and proper repair.
Should You Repair, Replace, or Upgrade Your Coffee Maker?
Deciding whether to repair your existing coffee maker or invest in a new one depends on several factors. If your coffee pot is not working, consider these points before making a decision.
Consider Repair If:
- The machine is relatively new (under 3-5 years old): Newer models often have parts more readily available, and the cost of repair might be a smaller percentage of the original purchase price.
- The issue is minor and easily fixable: Clogs, mineral buildup, or a faulty removable part (like a water reservoir or carafe) are typically inexpensive to fix or replace.
- The cost of repair is significantly less than replacement: Get a quote for the repair. If it's less than 50% of the cost of a comparable new machine, repair might be worthwhile.
- You have a high-end or specialized machine: Expensive espresso machines or commercial-grade coffee makers are often built to last and are worth repairing due to their initial investment and unique features.
Consider Replacing or Upgrading If:
- The machine is old (over 5-7 years): Older appliances are more prone to recurring issues, and parts can be harder to find. Components like heating elements or pumps wear out over time.
- The repair cost is high: If a major component like the heating element, pump, or control board needs replacing, the repair bill can quickly approach the cost of a new machine.
- The issue is recurring: If you're constantly troubleshooting why your coffee maker is not working, it might be a sign of systemic wear and tear.
- You want better features or energy efficiency: Newer models often offer improved brewing technology, programmable settings, integrated grinders, or better energy efficiency. An upgrade could provide a better coffee experience and potentially save on electricity.
- Safety is a concern: If the machine has experienced electrical faults, significant leaks, or burning smells, it's often safer to replace it than risk further issues, even if a repair is technically possible.
Decision Tip: For most standard drip coffee makers, if a repair costs more than half the price of a new, comparable model, or if the machine is over five years old and experiencing major issues, replacement is often the more economical and reliable choice.
How to Prevent This Problem Next Time
Regular maintenance is key to extending the life of your coffee maker and avoiding the frustration of a non-functional machine. These habits can help prevent common issues and keep your coffee maker working reliably.
- Regular Descaling: This is the most critical step. Depending on your water hardness, descale your coffee maker every 1-3 months. Use white vinegar or a dedicated descaling solution. This prevents mineral buildup that causes clogs and poor performance.
- Use Filtered Water: Hard water contains more minerals, which contribute to scale buildup. Using filtered water (from a Brita pitcher or a refrigerator dispenser) can significantly reduce the frequency of descaling needed.
- Daily Cleaning of Removable Parts: After each use, wash the brew basket, carafe, and water reservoir (if easily removable) with warm, soapy water. This prevents coffee oil residue and grounds from building up and causing clogs or affecting taste.
- Wipe Down the Exterior and Spray Head: Regularly wipe down the outside of the machine and gently clean the spray head or dispenser nozzle to prevent buildup from blocking water flow.
- Ensure Proper Placement: Always place your coffee maker on a flat, stable surface. Ensure there's adequate airflow around the machine, especially if it has vents. Avoid placing it near heat sources or in direct sunlight.
- Check Filters Regularly: If your coffee maker uses water filters (common in Keurig, Ninja, or Cuisinart models), replace them according to the manufacturer's recommendations. Clogged water filters can restrict flow and put strain on the pump. See our guide on how often to replace a dehumidifier filter for general filter replacement principles.
Related Buying Advice
If you're in the market for a new coffee maker because your old one is no longer working, consider features that address common failure points. Look for models with easily accessible and cleanable parts, clear descaling indicators, and durable construction. Machines with self-cleaning cycles or removable, dishwasher-safe components can make maintenance simpler. Consider the type of water filtration system it uses and how easy it is to replace. For those who frequently encounter issues like "why won't my coffee maker turn on," opting for brands known for reliability and robust design can be a wise investment.
Frequently Asked Questions
Why is my coffee machine not working, but it's turning on?
If your coffee machine turns on but doesn't brew, heats slowly, or water isn't flowing, the most common culprit is mineral buildup (limescale) clogging the internal water lines or spray head. Other possibilities include an improperly seated water reservoir, a clogged brew basket, or a faulty heating element that isn't sufficiently heating the water.
Why is my Keurig coffee maker not working and showing an error?
Keurig machines often display specific error codes for common issues. While we can't list every code, typical reasons for malfunction include a low water level, the water reservoir not being seated correctly, a clogged needle (from coffee grounds or scale), or a simple need for a power cycle reset. Refer to your specific Keurig model's manual for precise error code meanings.
Why is my Ninja coffee maker not working and not dispensing water?
If your Ninja coffee maker isn't dispensing water, first ensure the water reservoir is full and properly locked into place. Mineral buildup is a very common cause, so a descaling cycle is often the solution. Also, check the brew basket and spray head for any visible clogs from coffee grounds. A quick power reset can also resolve temporary glitches.
Why is my Cuisinart coffee maker not working and leaking water?
Water leaks from a Cuisinart coffee maker often stem from an overfilled water reservoir, an improperly seated carafe or brew basket, or a crack in the water reservoir itself. If the leak is from the bottom of the machine, it could indicate a more serious internal issue like a broken hose or seal, which typically requires professional repair.
Why won't my coffee maker turn on at all?
If your coffee maker won't turn on, start by checking the power source. Ensure it's firmly plugged into a working outlet (test with another appliance). Check your home's circuit breaker to see if it's tripped. If the outlet is fine, try unplugging the coffee maker for 5-10 minutes and plugging it back in to reset it. If it still shows no signs of life, there might be an internal electrical fault or a failed power component, suggesting a potential replacement.